This extension puts you to just few clicks away from deploying your application to Developer Sandbox, a 30 days no cost shared cluster on OpenShift. After few simple configuration steps the extension allows you to push an image to Sandbox internal image registry, so you can create and start containers from that image in OpenShift cluster using Podman Desktop UI.
Once installed, you can find the Sandbox resource added to the Resources settings page.
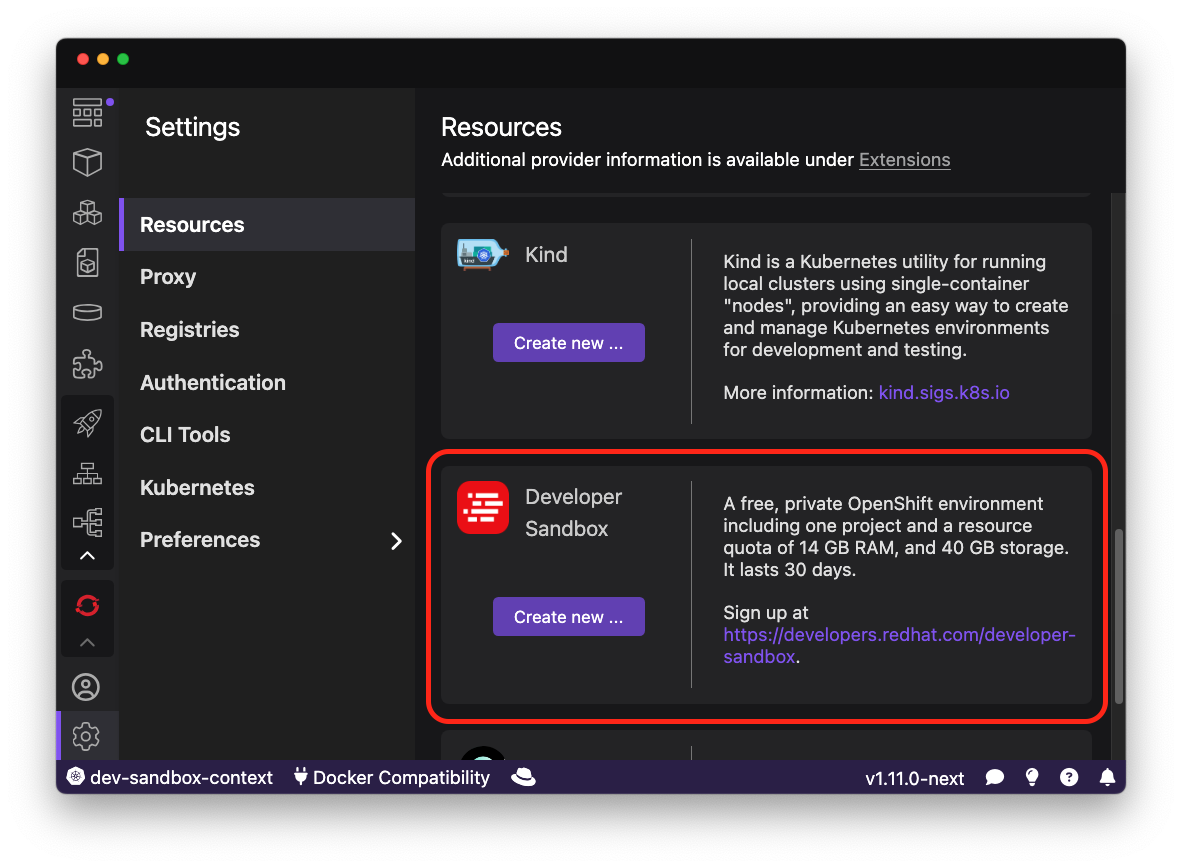
To configure the Kubernetes context for your sandbox, click the Create new... button to open the sandbox Kubernetes context configuration form. Use the default context name dev-sandbox-context, or change it to any name you prefer, and then click Create. If you have not yet signed in to your Red Hat Developer account, you will see a request to sign in with Red Hat SSO.
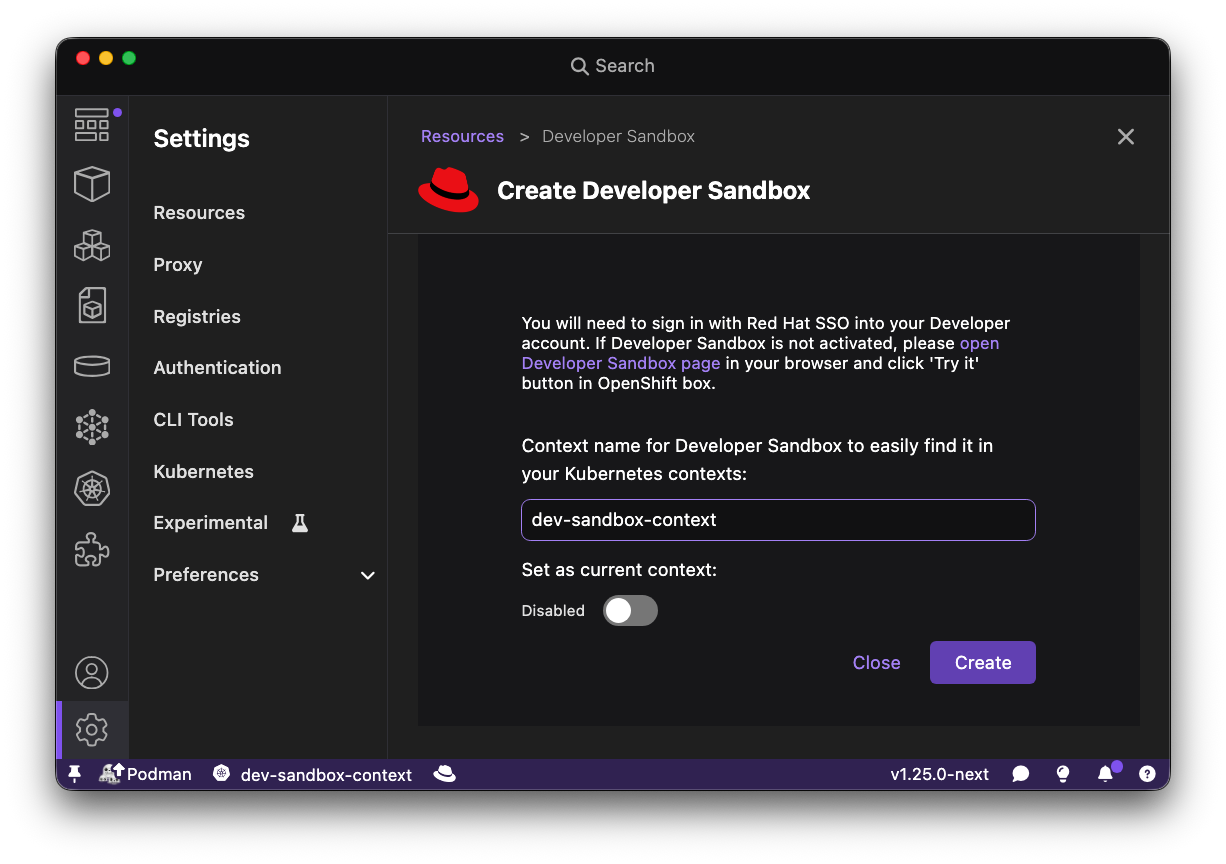
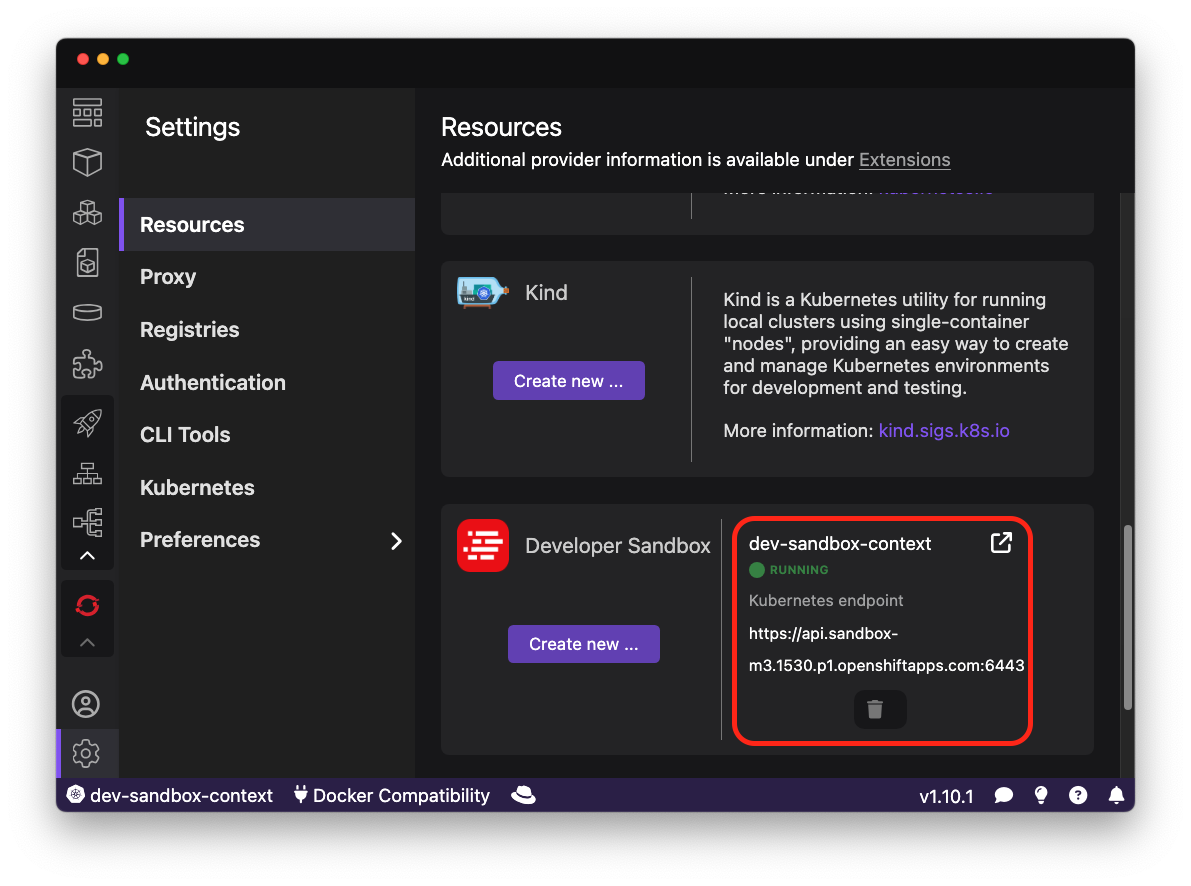
After that, you should see a new sandbox connection in Running state in the Sandbox section. If you see the message Developer Sandbox account verification is required, follow the instructions at the top of the Create Developer Sandbox page and try again.
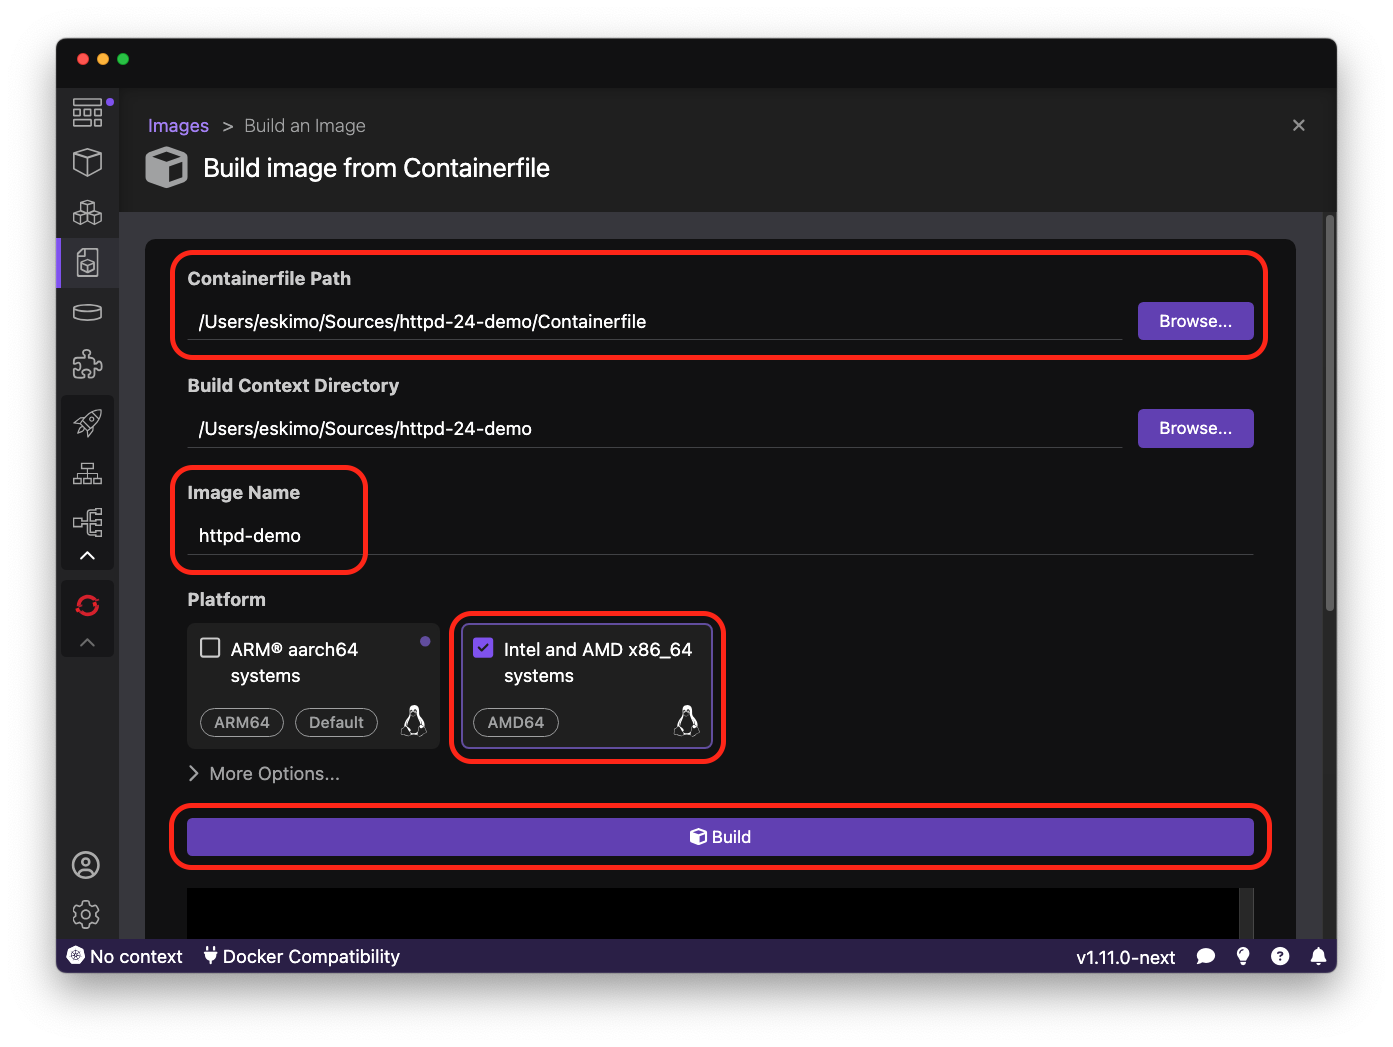
To deploy your first application on OpenShift. Create Containerfile shown below
FROM --platform=linux/amd64 registry.access.redhat.com/ubi8/httpd-24:latest

LABEL org.opencontainers.image.title="Simple application with static content" \
        org.opencontainers.image.description="This is example of using Apache httpd 2.4 image to deploy web server with static content" \
        org.opencontainers.image.vendor="Red Hat"
Open Podman Desktop 'Build image' page and point Containerfile path to Containerfile above. Put httpd-demo
in Image Name field. Select Intel and AMD x86_64 in platform section and press 'Build' button to build the image.
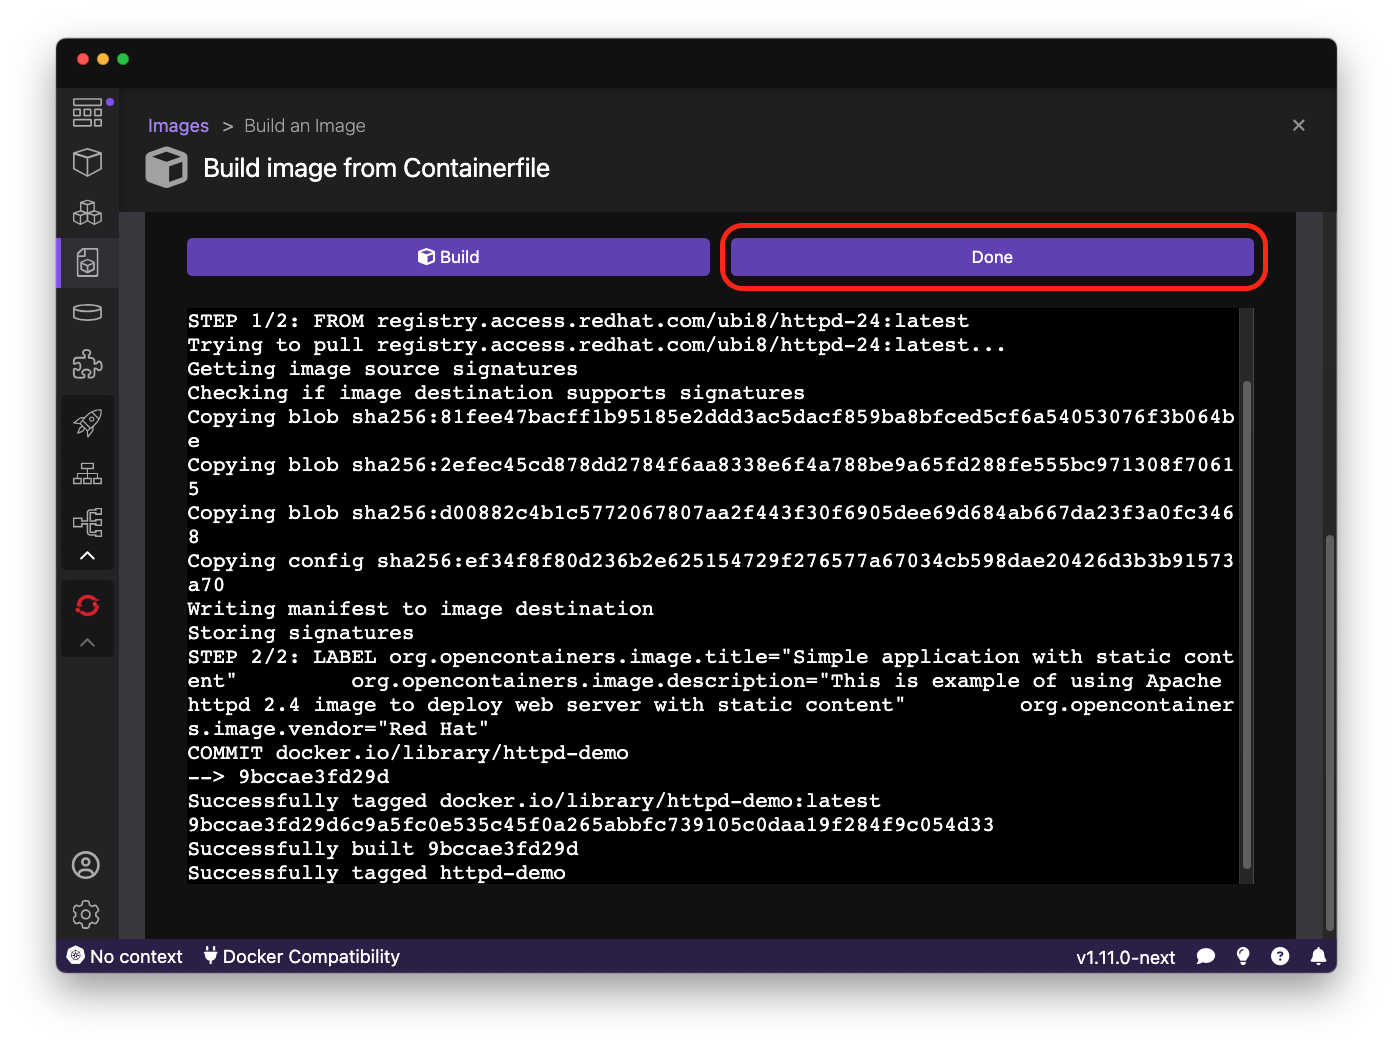
After build is done press Done button to switch to Images page.
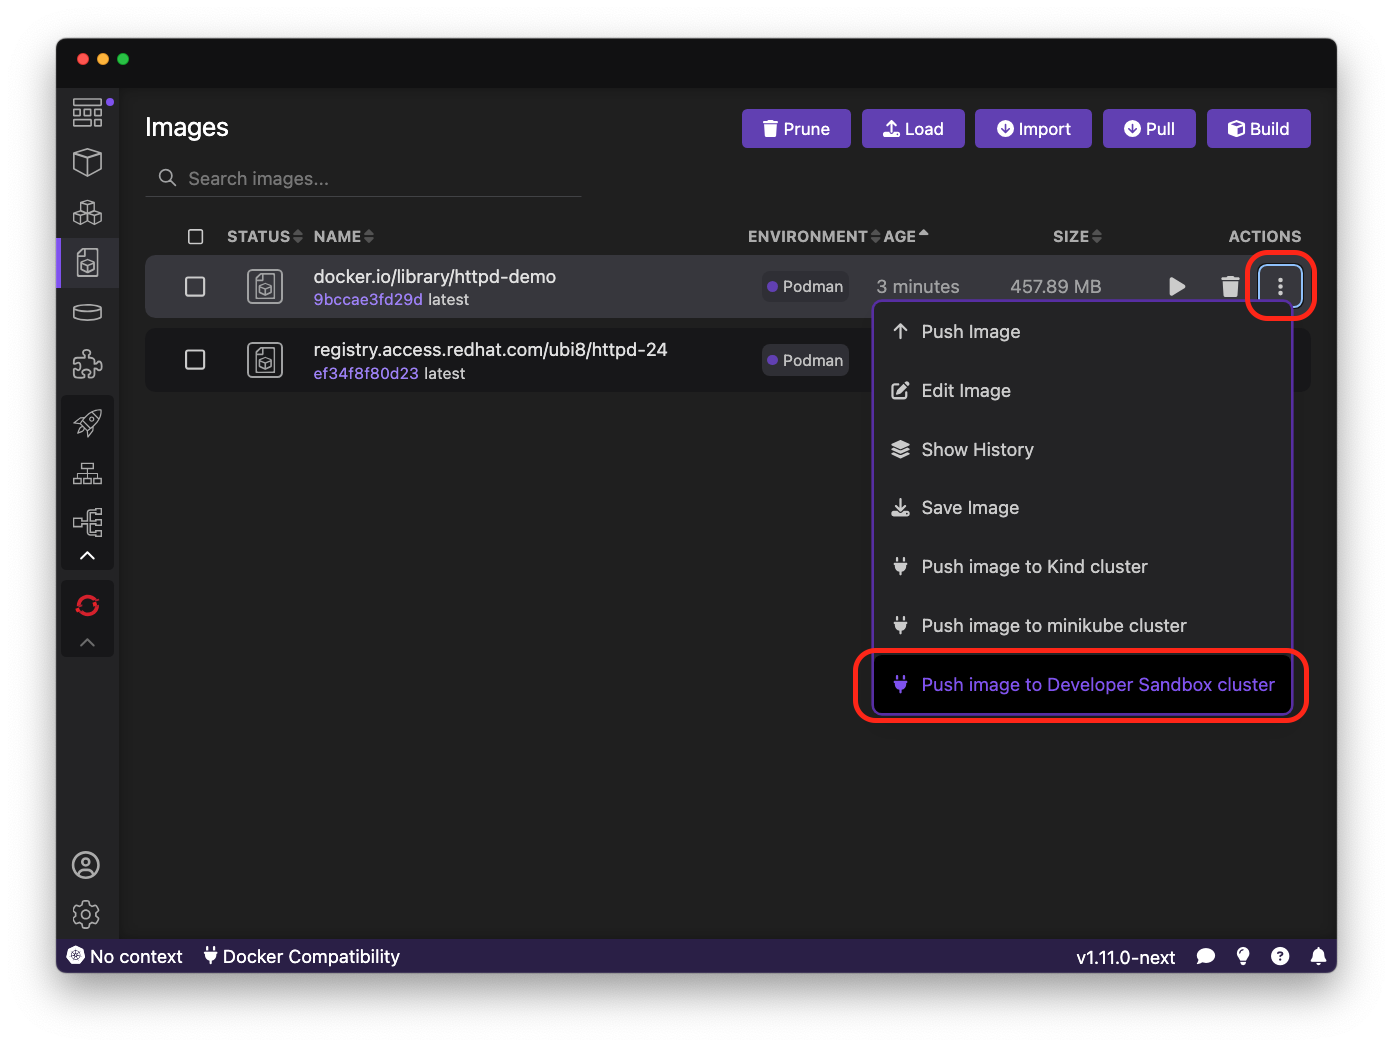
In the Images page find httpd-demo image and select item Push to Developer Sandbox cluster to tag image with
Sandbox internal registry name and then push tagged image to the registry.
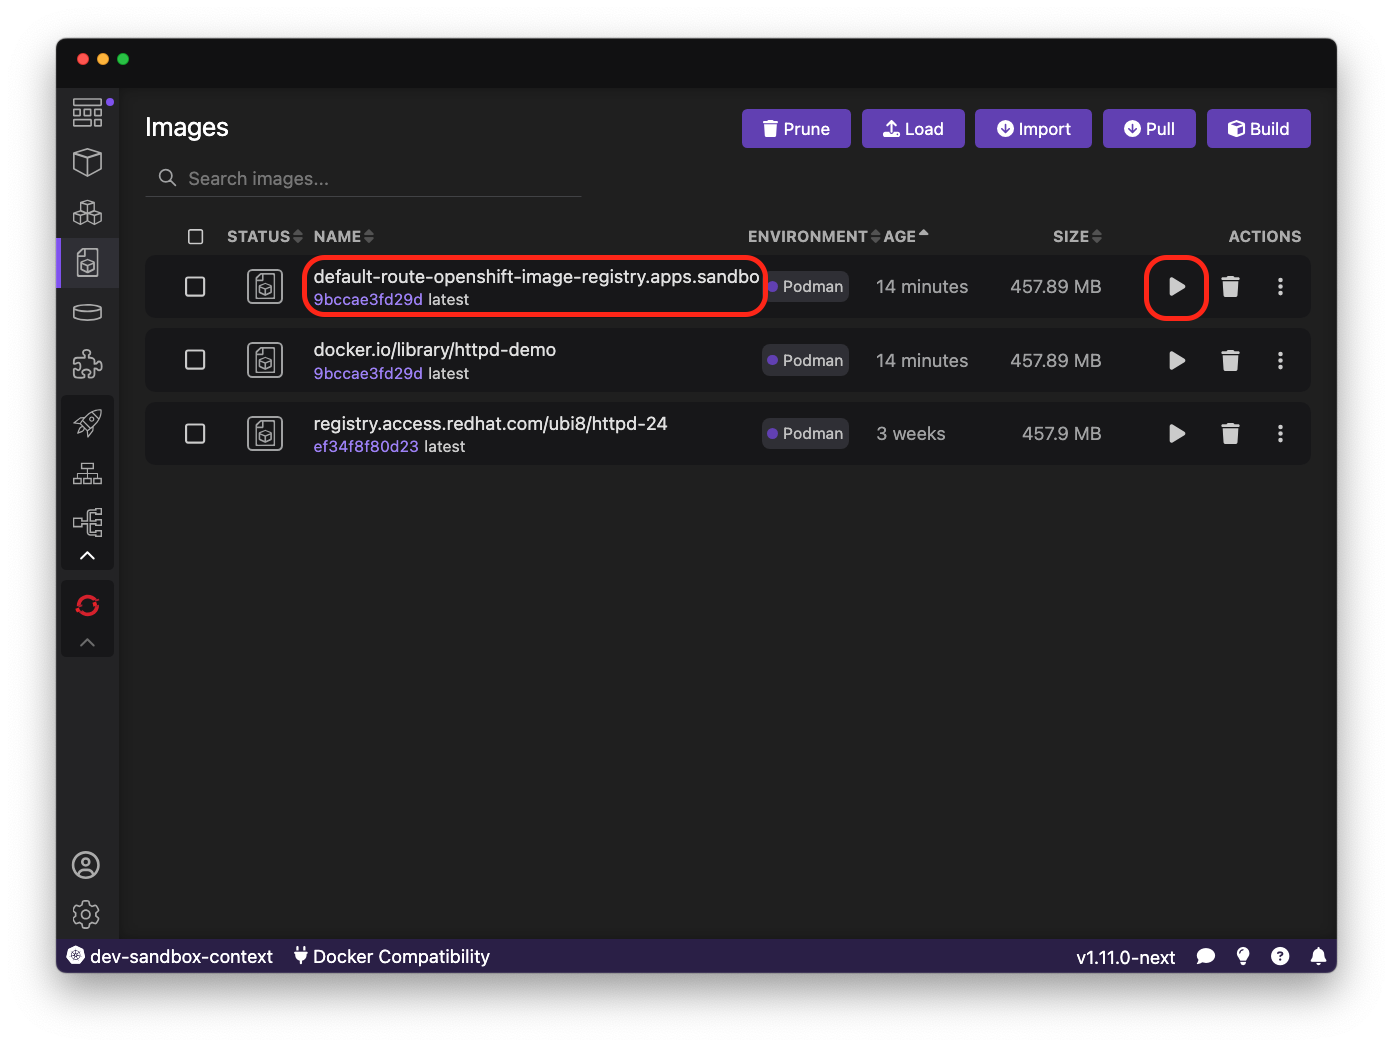
After successfully pushing the image to internal Sandbox image registry an information message with explanation should appear.
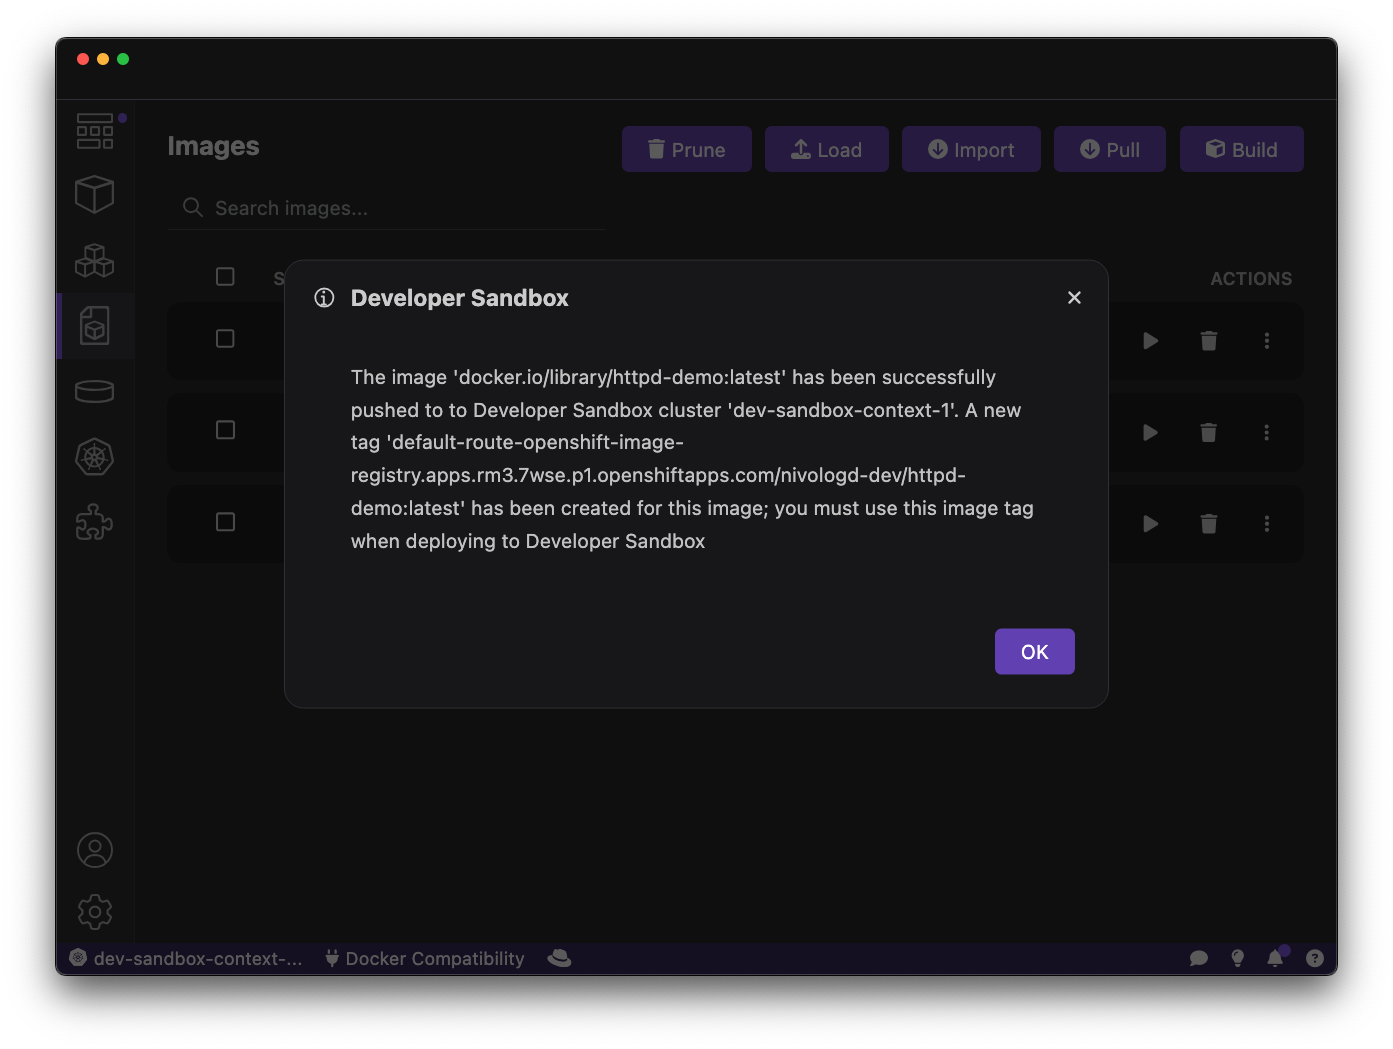
Close the message and run the image mentioned in it using run button on the right side of the image item.
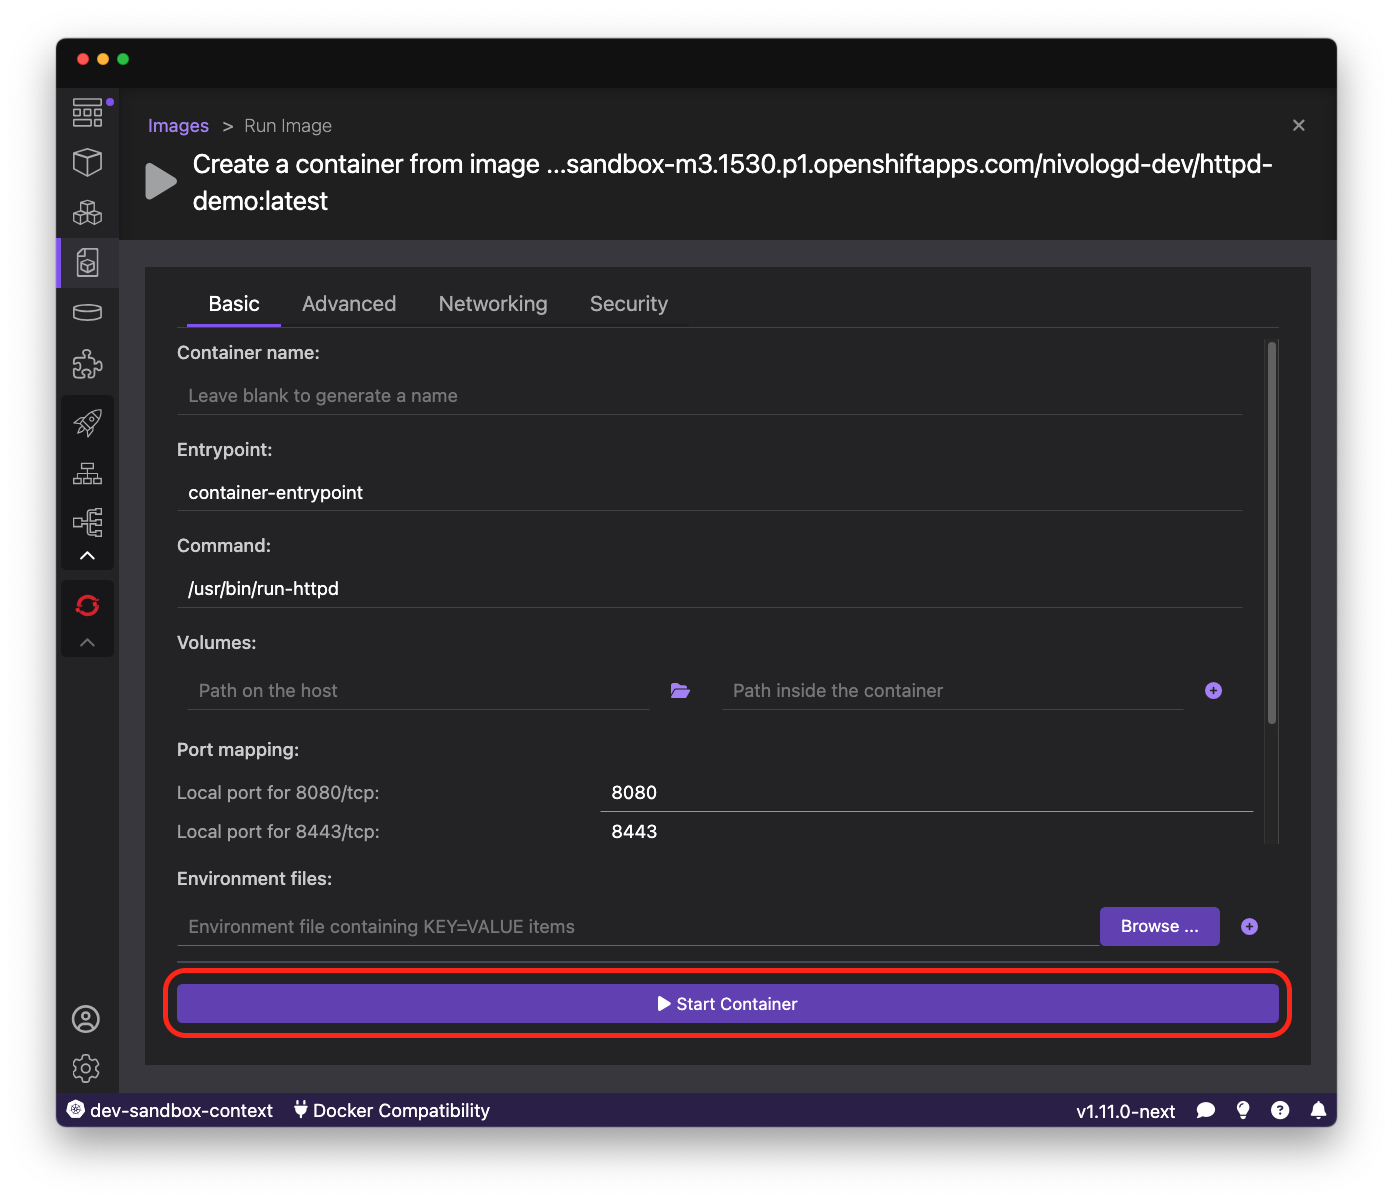
In Create Container leave all default values and press Start Container button.
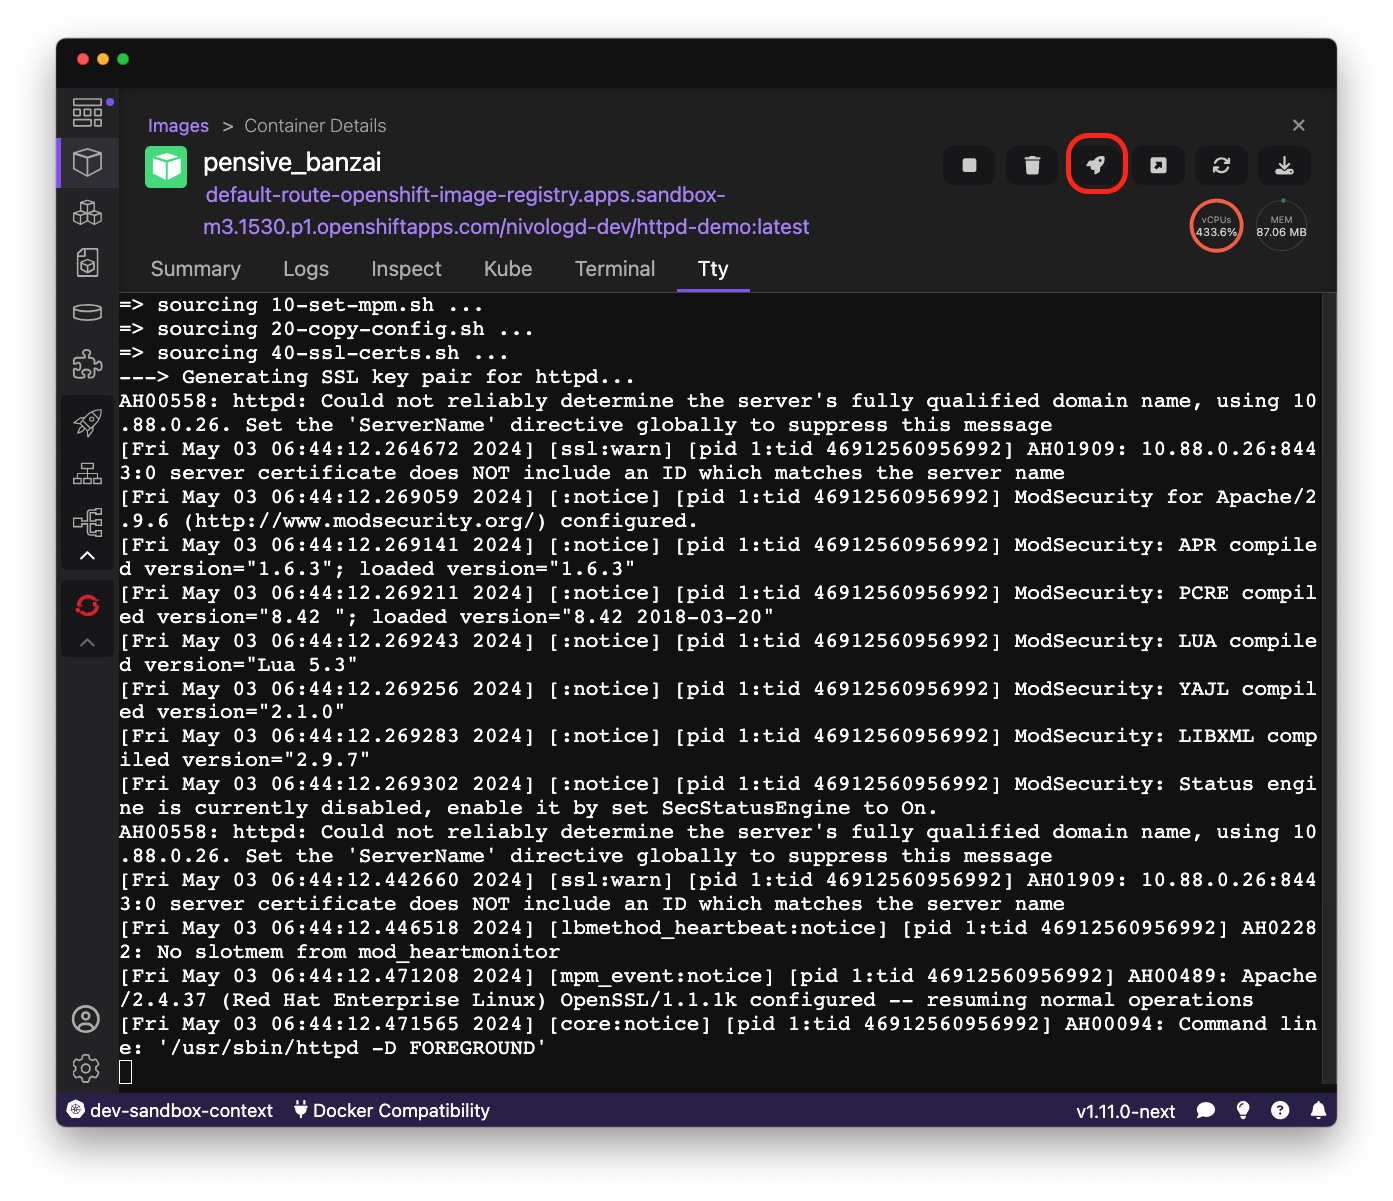
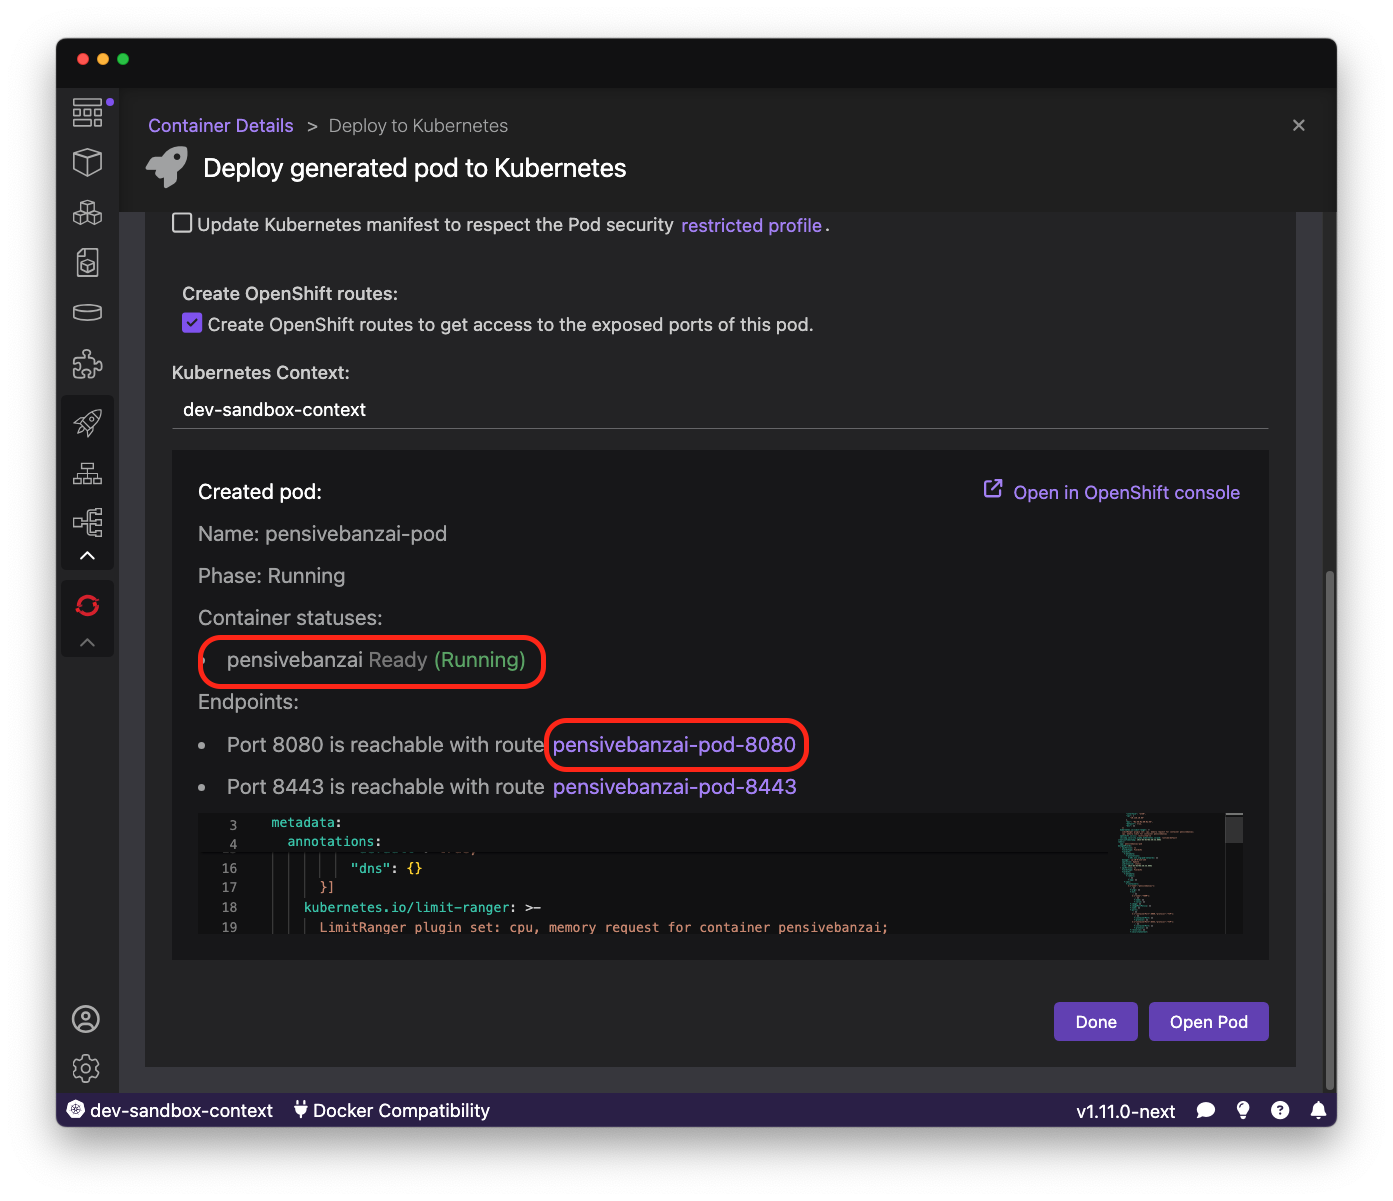
After container successfully started it can be deployed to kubernetes.
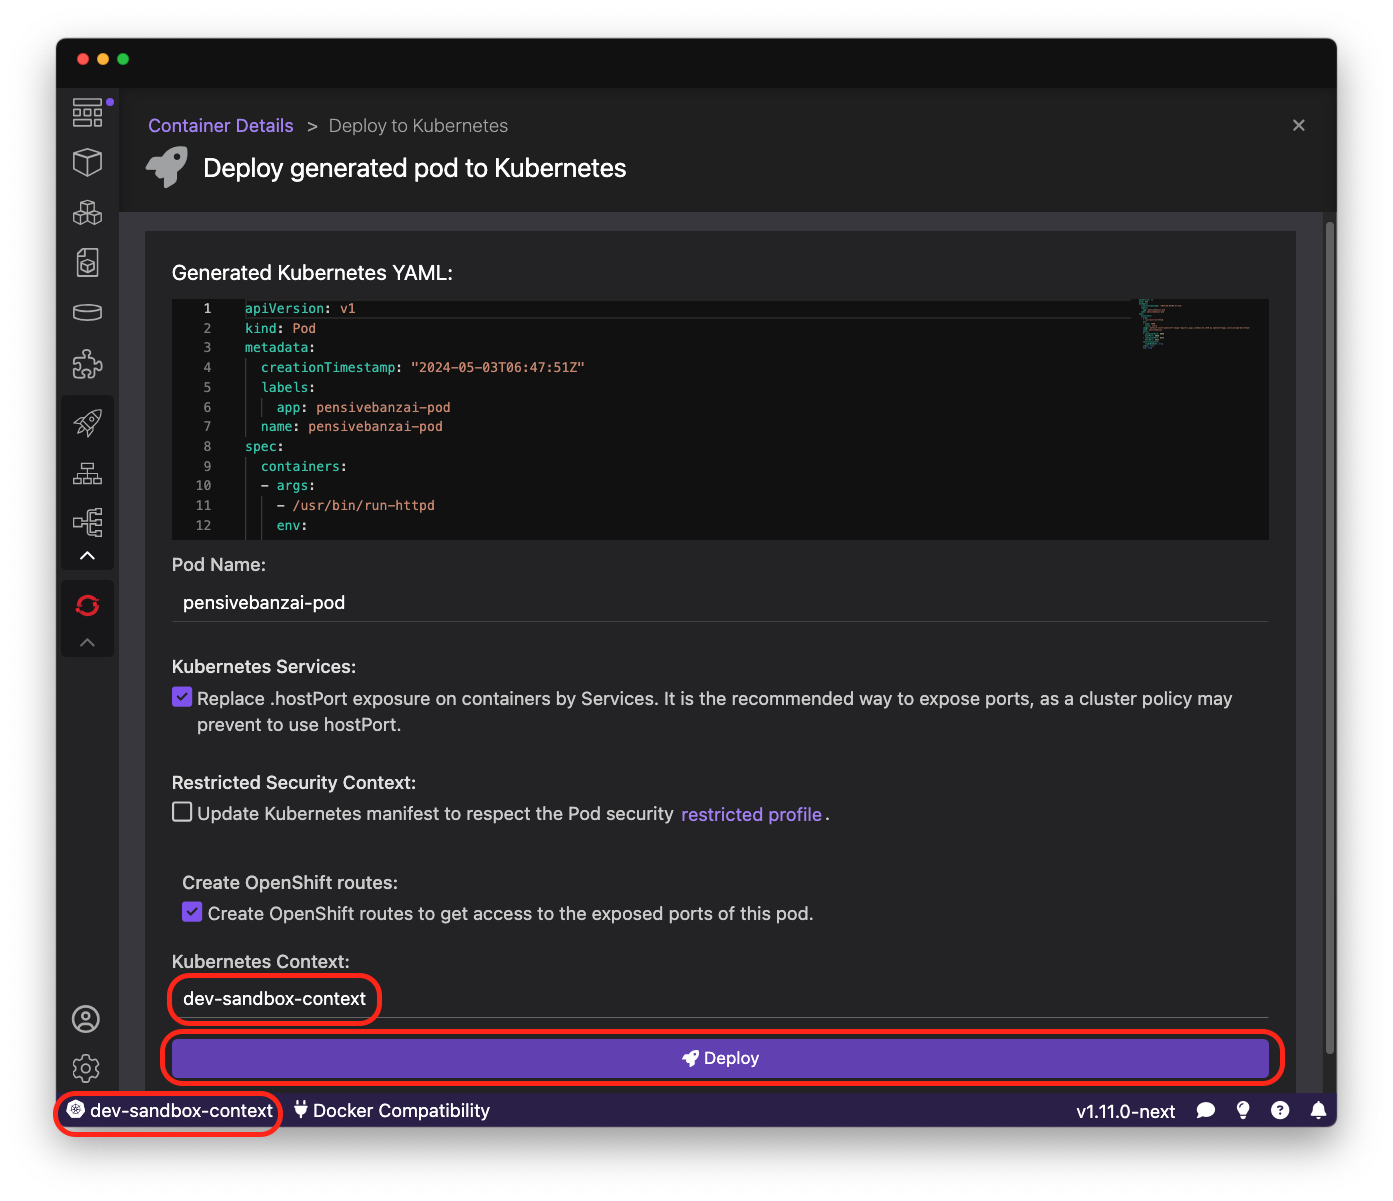
Make sure current kubernetes context is pointing to Sandbox and press Deploy button.
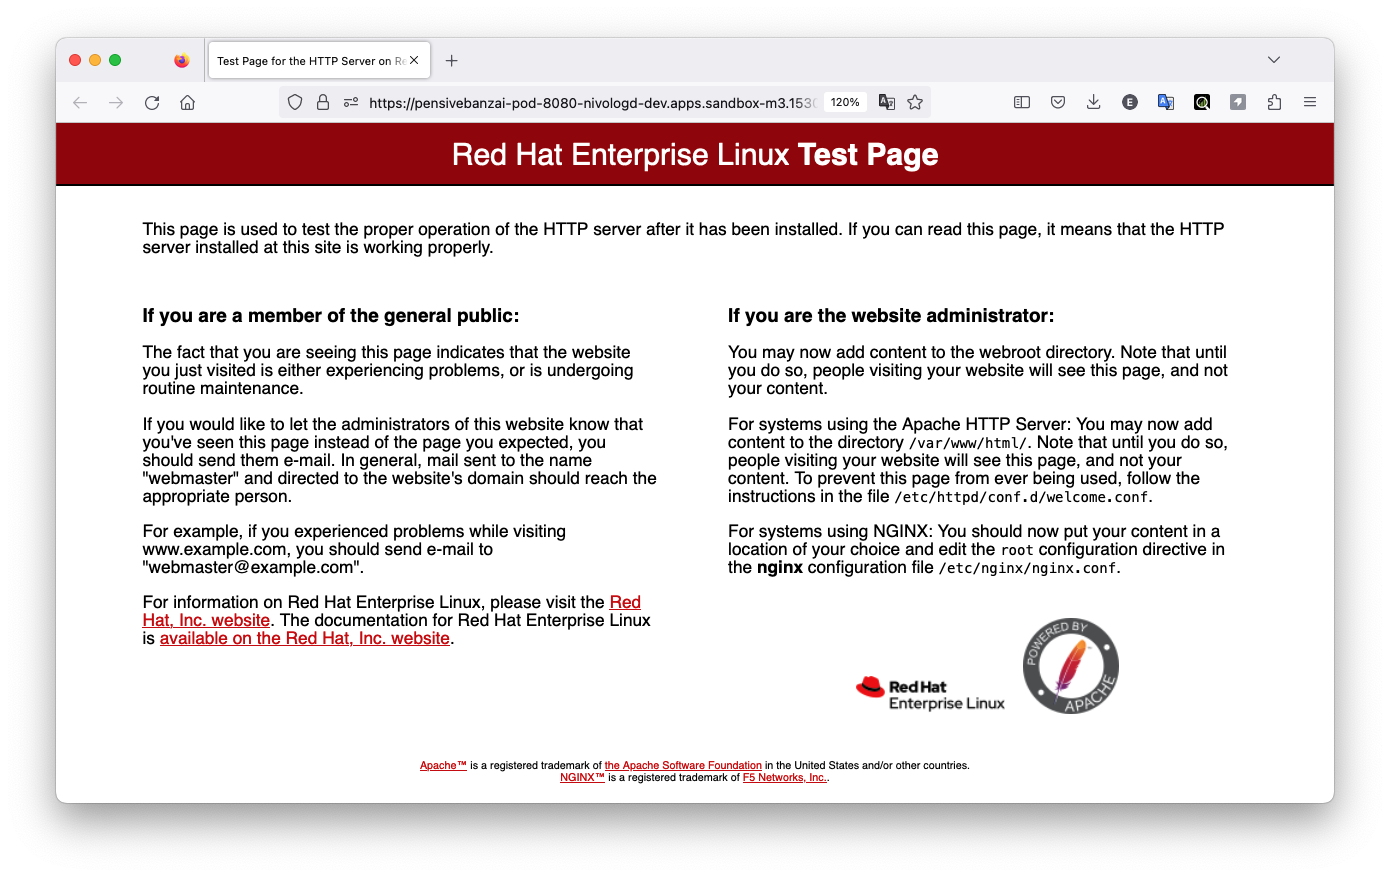
After successful deployment application can be opened in browser.
The browser window should show default test page for the running HTTPD server.
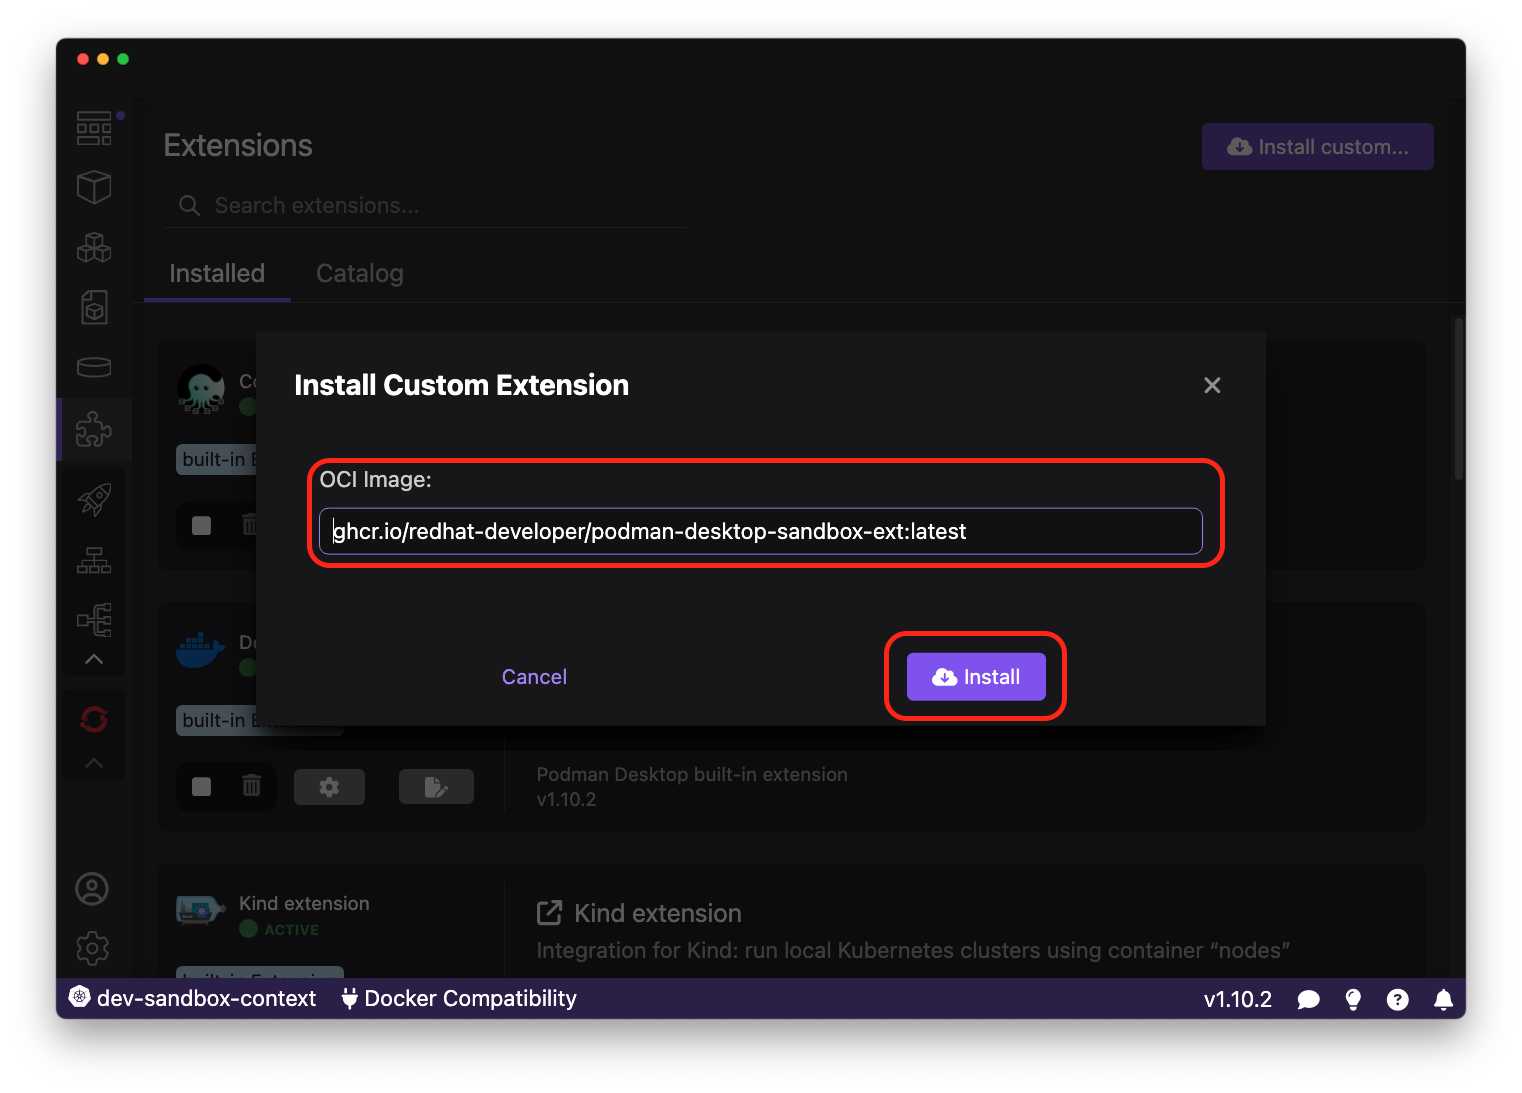
You can install Developer Sandbox Extension directly from Podman Desktop Extension page.
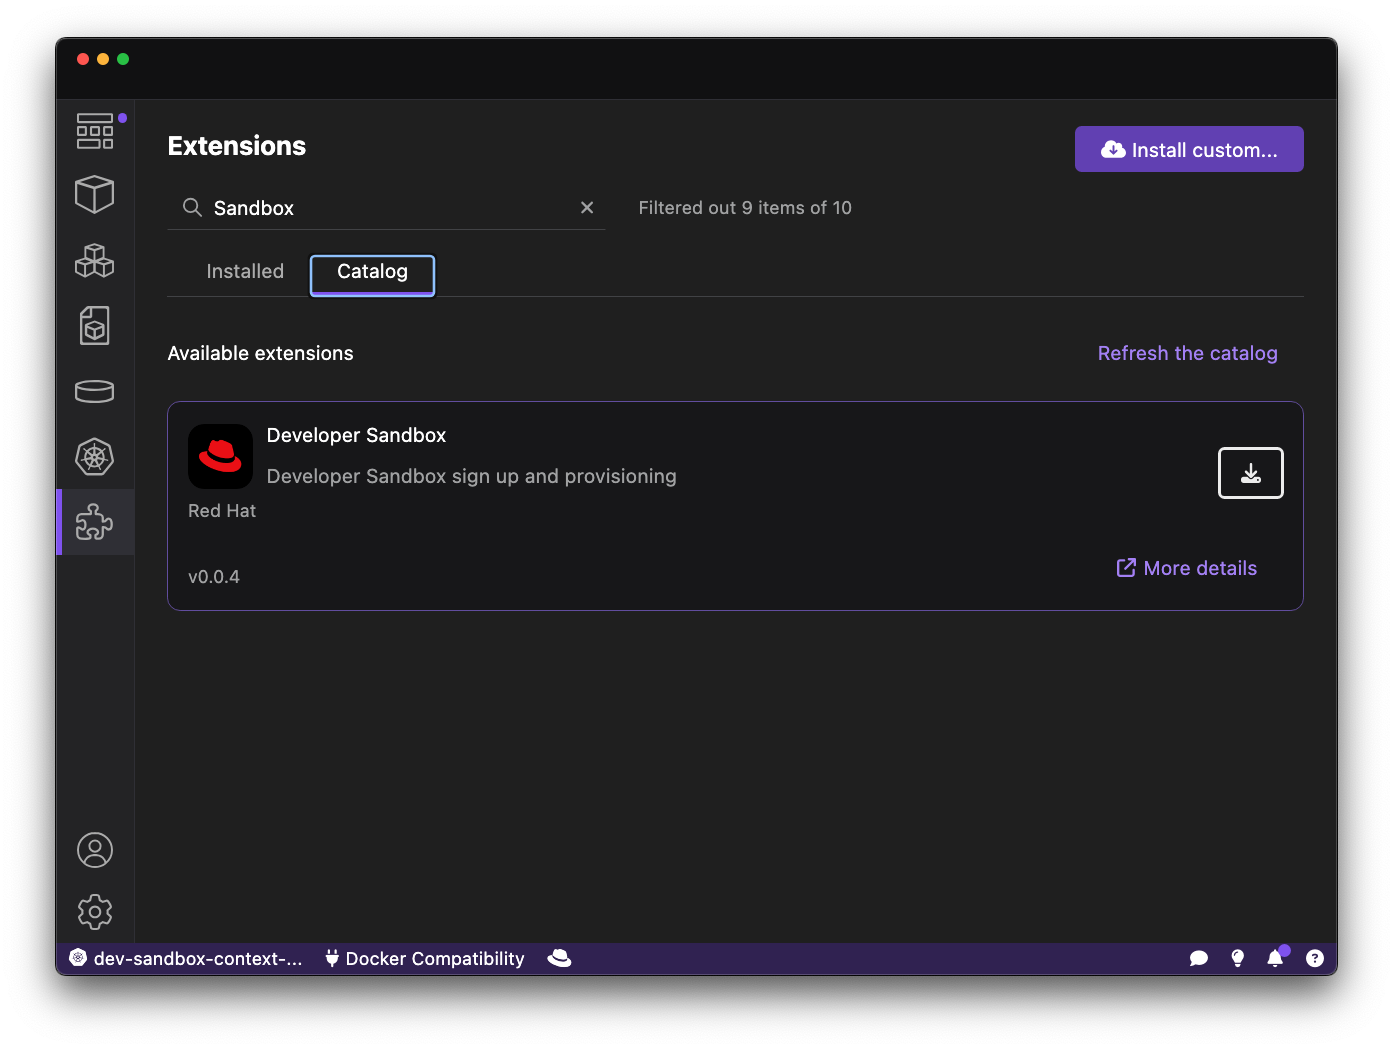
On the Extension page press 'Install custom ...'.
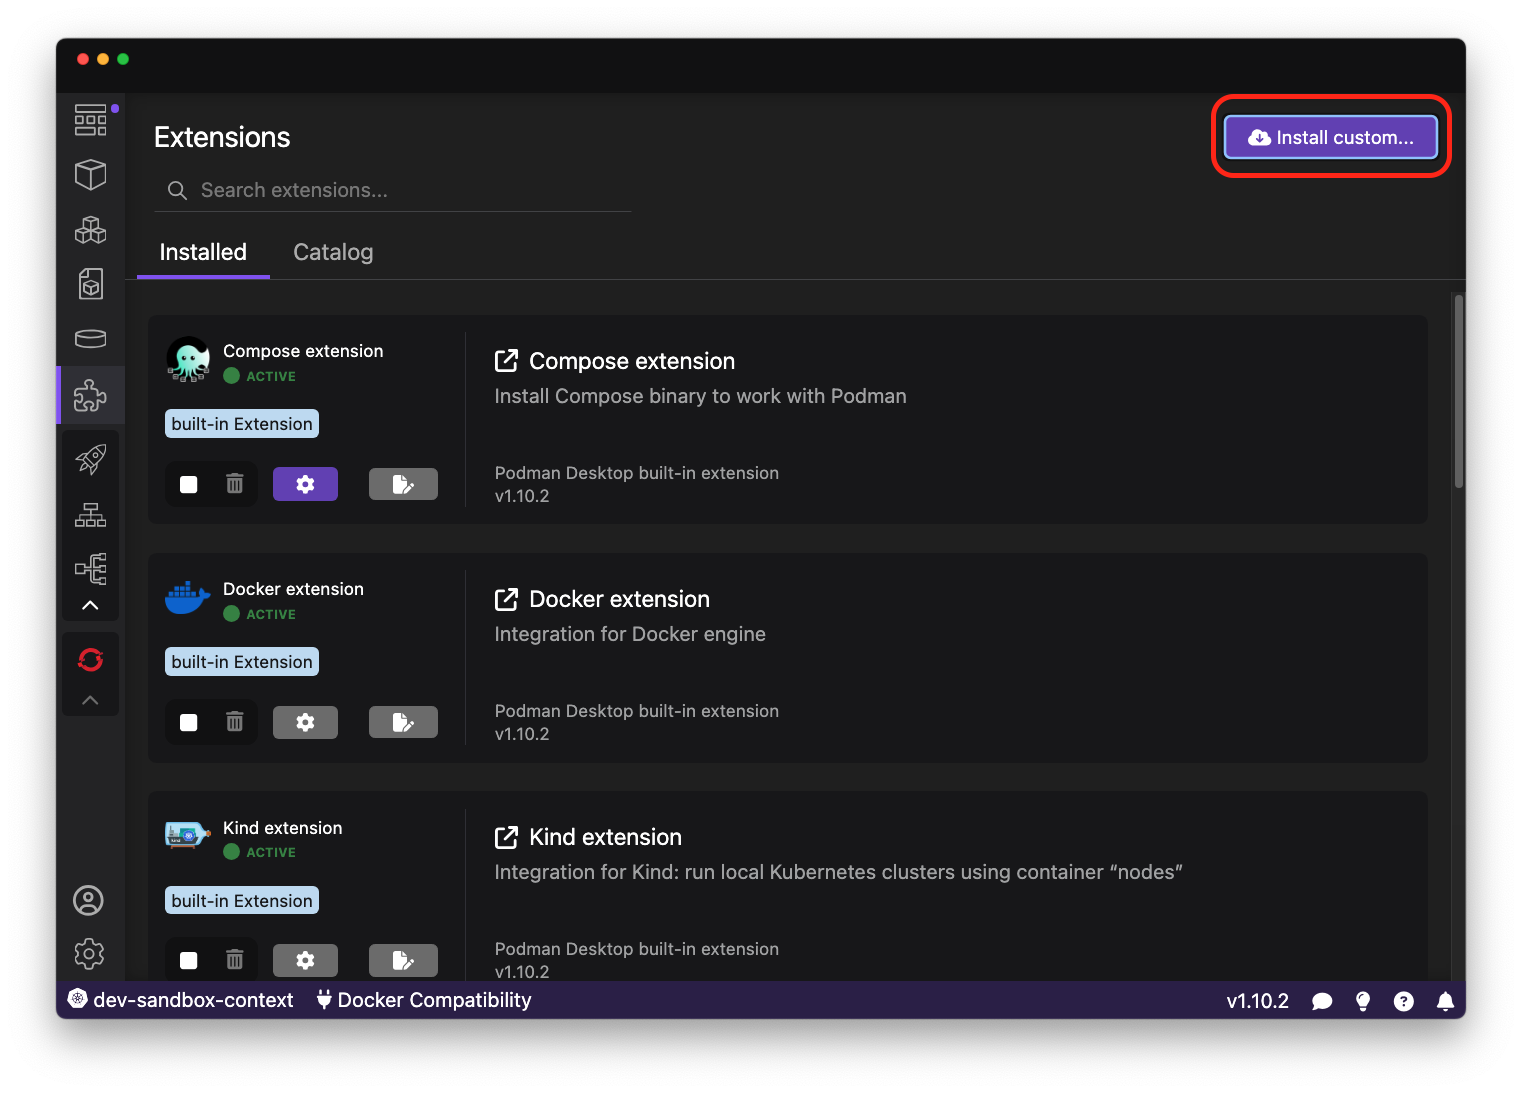
Paste ghcr.io/redhat-developer/podman-desktop-sandbox-ext:latest to the OCI Image field and press Install button.